arrow_backBack to home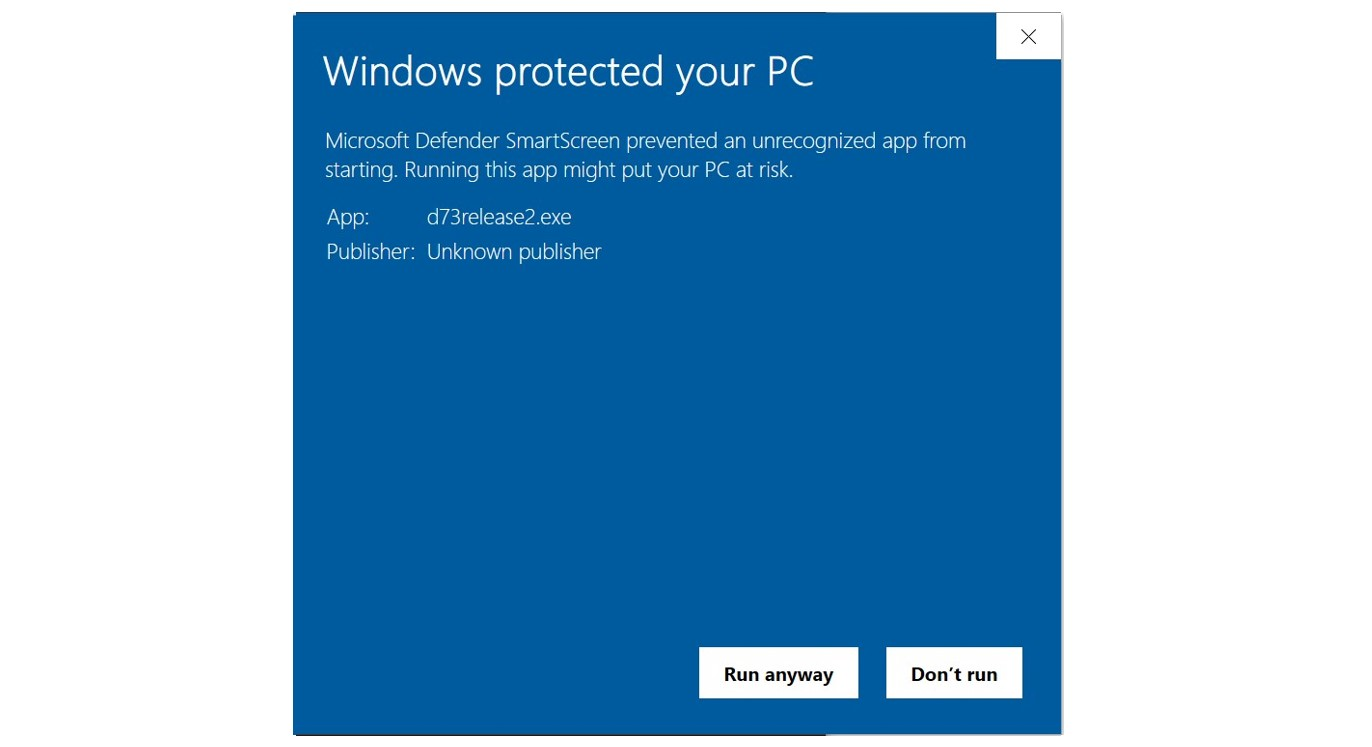

Installation Guide
Complete setup instructions for the NISA agent
1
Installation
Download and run the agent
download
Download binarynisa-agent.exe
Downloadfolder
Place this file somewhere on your server/computer. It will auto-generate required files over time.
admin_panel_settings
Run "nisa-agent.exe" with admin privileges and wait for the UI.
warning
For now, accept the security warning by clicking "More info" and "Run anyway".
Security warning dialog when running unsigned binary
visibility
Once launched, the Agent UI will appear for configuration.
Agent UI successfully launched
2
Configuration
Set up your connection
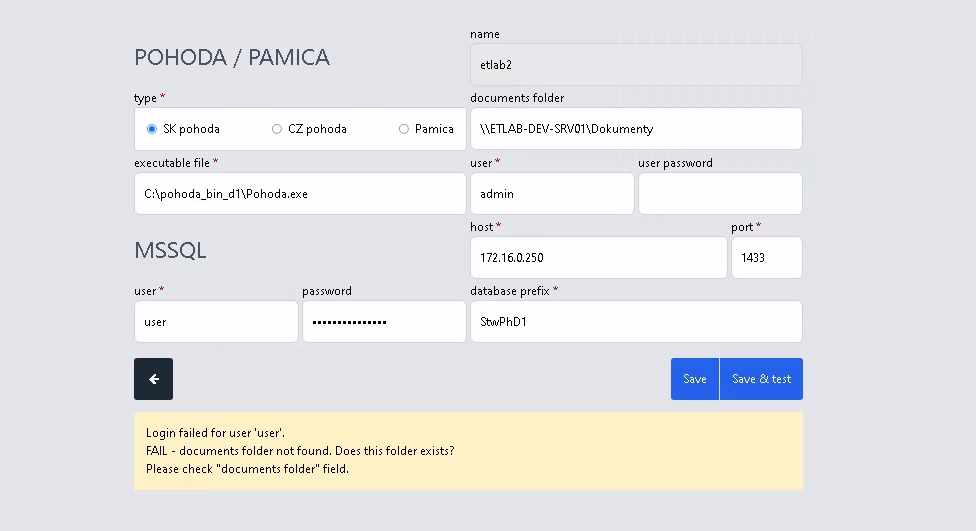
Configure the agent to connect with your Pohoda/Pamica installation. You'll need to specify the documents folder, executable location, and database credentials.
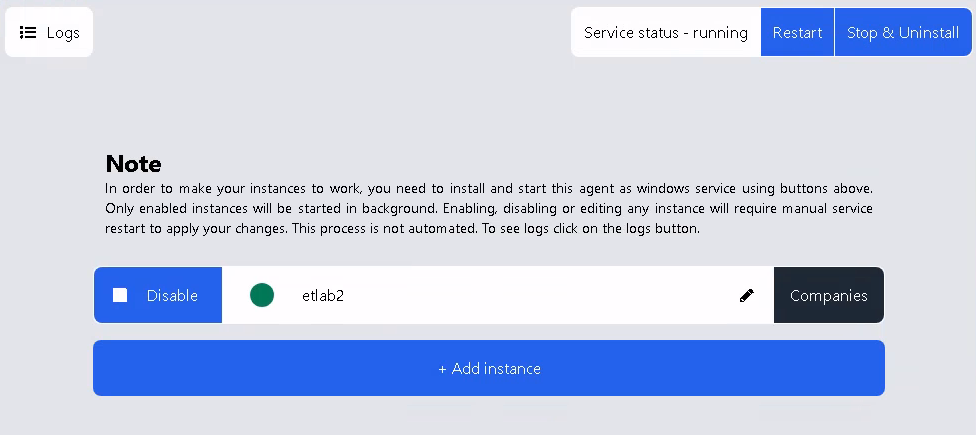
Interface Capabilities
Service statusService actionsLog tracesAdd instanceEdit instanceEnable/DisableCompany list
Main dashboard with service controls and company list
The configuration dialog allows you to set up connections to your MSSQL server and local paths.
Connection configuration dialog
info
Known Limitations
Important notes
warning
Permission Settings
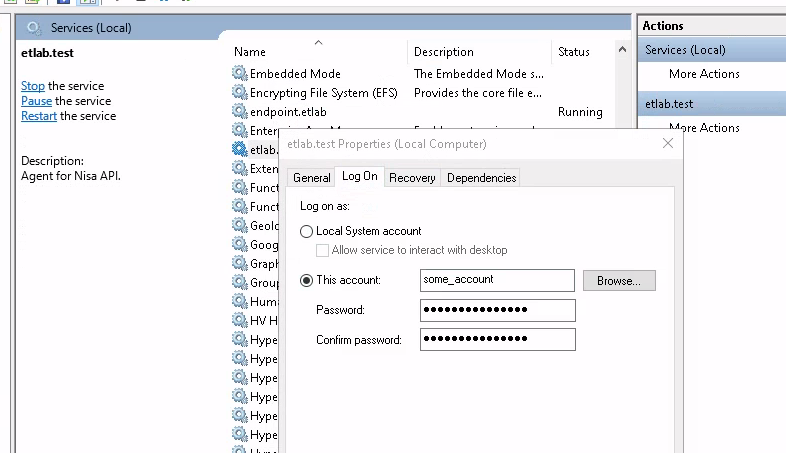
If the service cannot access the Pohoda/Pamica binary, you may need to change the service logon account.
Service properties > Log on tab
NISA Digital